Showing posts with label cricut. Show all posts

Saturday, January 14, 2012

Love You

I'm still finishing off the odd layouts for Nathalie's first year. I am generally the ones taking photos and so often I'm not in them. That always suited me just fine until someone said something about my kids wanting to see pictures of me when they get older. I thought about that and I had to agree. So, I've been making more of an effort to be in photos and then to actually include those photos in their books.

I did this quick layout of a few photos of the two of us.


I like the simplicity with just the small splash of colour. The heart is done with Black Magic Core'dinations paper. I cut out the heart with my Cricut and then embossed with my Seeing Dots folder and sanded it so a little pink paper would show through. I love black on a layout and I really like how the pink tied it in a bit too.

Wednesday, November 16, 2011

Sweet

I am starting to see the light at the end of the tunnel regarding Nathalie's scrapbook. The pile of photos is going down and I've set a goal to be done layouts to her first birthday by the end of 2011. That may not seem too difficult, but I just don't seem to ever have enough time. So, I'm just going to push hard and see what I can get done on her album.

I saw a layout in a magazine which inspired this Sweet layout. It's very simple; just a 12x12" piece of patterned paper, a scalloped frame which I cut from my Cricut (but you could just cut if you wanted) and 3 small embellishments. So simple, but I love it.

Friday, November 11, 2011

Peace

I was at a retreat last weekend and my goal was to finish my Calendar Swap pages and my Christmas Cards. I sat down a few days before I left to start my calendar prototype. I was very nervous as typically, it takes me hours to finish a prototype that I like. Well, that day, it just came together. I did a few things and then it was done. It's very simple, but I love it.

I started out by wanting to cut something out of the Cricut and I found some cool flower spray. They turned out to be poppies.

Then I found that I was missing some texture, so I stamped a little background script stamp (Stamping Bella). I wanted a stamp for the bottom right and I chose a scripty Peace one.

I had November and I wasn't even trying to do a Remembrance Day theme, but it just happened. It was so bizarre, but I love how it turned out. So simple. So perfect for Peace.


Take a moment today to remember all those who have fought and who are still fighting for our freedom. One of my strongest, most powerful memories is from standing on Juno Beach in Northern France. It is the beach the Canadians landed on for D-Day and imagining what happened there years ago really hit me hard.

Thursday, August 25, 2011

My Love


I was playing around in my stamp room the other night and was in a mellow mood. I finished my Bathtime layout and then wanted to start another. I was flipping through a magazine and saw one I liked. The problem was that it was very finicky and so out of my comfort zone.

But I was in a weird zen type mood and not stressed about how far behind I am or how much I have to do and so I just went with it.

I used my "Olivia" pack from Basic Grey so that all the circles would match and coordinate and then I cut some strips from the same paper. I hate to admit it, but it was kind of fun playing with all the circles to place them. I don't know that I'd do it again, but it was fun because I was in the right mood.

Then I stamped the Magenta flourish in black and added a journaling block (from the kit) and a flower. The "my" from the title is out of grungeboard and then I cut "Love" with my Cricut. I really like how the black kind of grounds stuff and makes it pop.

Overall, this layout took me awhile but I like doing those kind once in awhile.


Tuesday, August 9, 2011

An Anniversary

My parents are celebrating their 40th anniversary in October and we are having a party. I volunteered to do the invitations and so I did two completely different prototypes. One photo type card and then one stamped card. In the end, the photo card won out, but I quite like the stamped one I made. I really struggled trying to get it to be something I liked, but I mostly got there.


I used my Cricut to cut out the hearts and then I stamped a flourish by Magenta. I used my Tim Holtz scallop border die to cut the middle strip. I'm sort of glad that they didn't choose this one though as it definitely would have taken me longer to make and we were pressed for time.

Thursday, June 23, 2011

I broke my cardinal rule

For those who know me, they know my cardinal rule is keep it simple. There are many sub-rules such as:

1. No embossing
2. No cutting
3. Do not ever use glue because it is messy sticky stuff that gets everywhere and makes your fingers stick to everything

Those cover just about any circumstance, but the keep it simple part generally covers it all.

I hate glue (can you tell??) and I'm too lazy to emboss and I am cutting challenged. So, really, the rules are out of necessity.

That said, I created a layout the other day that broke my cardinal rule about keeping it simple. I was doing a Santa layout for Nathalie and my new Cricut cartridge (Life's a Party) had a Santa you could cut out. It looked cute and it seemed like such a good idea at the time. Well, to make that work, you need to cut out 455646546 different layers and make sure the cardstock all goes together. Then you need to piece it all together and glue it down. Major infraction of the rule.

Of course, once I started, I wanted to see if I could in fact do it and I did and I actually kind of like how it turned out. I have all these Cricut Cartridges and mostly just use them for letters which is a bit of a waste. So, I am going to try to cut out other things too and actually get some good use out of them. But I'm going to have to wrestle all of that with the cardinal rule. It might just need some adapting.

Sunday, April 10, 2011

CASE'd Flower

Kayla had a birthday party to go to yesterday and so she needed to make a card. She wanted to cut some flowers out with the Cricut and layer them onto her card. So, we grabbed the Accent Essentials cartridge and started cutting. When it was all done, I was very impressed with how it turned out.

Fast forward to today and I needed to make a card, so I case'd my daughter's flower card. I made a few changes, but for the most part, the design was hers. She thought it was very cool that I copied one of her cards.

I cut out three flowers; one at 4" one at 3.5" and one at 3". They were kind of plain, so I stamped the background stamp from Tim Holtz' "I See Paris" set (I use this background all the time). Then I inked the edges of each flower using my little dauber and it helped differentiate the layers. Then I used pop dots to adhere the different flowers and added a brad in the middle. I wanted to add a little bit more, so I used some of my little Dazzles to go around the center and I loved it. I added the leaves and I was done.

Saturday, February 19, 2011

Orange? Seriously?

Anyone know knows me, knows that I have my go to colours. And orange is not one of them. At all.

That said, I specifically ordered this Basic Grey paper package because it contained colours that were so outside my box. And I felt creative today, so I grabbed it. I flipped through the paper and this striped paper caught my eye. I put it on orange paper because I didn't think I could go crazy with colour. Baby steps, right?? I kind of liked it. I pulled a darker purple from it to mat the photos so they didn't get lost in the psychedelic paper and I really liked how it looked, so I did lettering in the same colour (I cut the title from chipboard and then from the purple and just glued the purple onto the chipboard so I could have custom coloured raised letters).

The package comes with embellishment stickers, so I just added one. This particular package has stickers that I can't see myself using (some owls and orange trees and such), but that's OK. I love that everything goes together. I added another purple accent piece under the sticker.

I love the look when people write and doodle on their pages. Unfortunately, I hate my writing and I can't doodle to save my life. It's really bad. I do keep reading how important it is to write on at least some of your layouts and so I try. I wrote a little bit along the top of the paper and then just added dots around the striped paper. It turned out adequate and even looks good from far enough away. I used my Copic Multiliners which I love. It's a set of 7 black pens ranging from micro to thick. And they're black. Really black, which I love. I brought them in last fall and have sold quite a few sets (they're $22).

I don't know that I'll be filling my album with a bunch of orange and lime green layouts, but who knows what will happen when I sit down to scrapbook again. Overall, I really like the layout even though it is so outside my box. It's fun to push the limits.


Thursday, February 17, 2011

Flourished Hearts

I have all these photos of Nathalie and thought I would just put a bunch of the really early ones together on a layout. I figured I didn't need a lot of journaling (and I had just finished her birth page and wrote enough on that to get me out of journaling for a few pages). I was originally going to copy this one layout in a book, but in the end, it didn't turn out anything like that layout which was fun. Sometimes, I just need to look at something and then I can turn it into something totally different. It doesn't need to look like a picture.

I had a friend years ago who knew a group of guys who lived together. They used to cook for each other and the only rule was that if you made something from a package, you needed to make it look exactly like the picture on the package. I know a lot of people who try to do the same thing with stamping and scrapbooking; they see a picture but don't know where to start because they don't have the same paper or embellishments. I try explaining that it really is just a guideline. Get some inspiration from it and then make it into whatever you want.

I got the pictures arranged and needed to figure out what I wanted to fill in the empty spots. I often find that the hardest part. I get sick of the same embellishments and so I get stuck. This time, I cut some hearts out of chipboard (I love my Cricut; I can cut whatever embellishments I want and I can make them any size I want). I inked them with Victorian Velvet Distress Ink using my Ink Blending Tool and then stamped my favorite flourish (Magenta) in black. I loved them and they looked great on my pages. But there was still empty spots and I was going to cut out a bunch of flourishes, but instead, I just stamped them in the empty spots and I loved it. It's so simple, which I love.

Wednesday, February 16, 2011

I'm on a roll

I've been scrapooking more and more and the creativity is starting to come back. I had my friend Lea over yesterday and I finished 2 layouts. I'm done most of the beginning ones for Nathalie's album, so now I feel a bit more free. I don't know if I can explain it, but I also don't know if it matters. I'm just feel like I'm getting there.

OK, so these aren't the most flattering pictures, but I don't even mind. I had just had a baby and I recognize that I wasn't looking my best, but it's really more about the adorable baby, isn't it?

Awhile ago, my friend Jackie Smith (see her blog here) convinced me that I needed the Paper Lace Cricut Cartridge, so I naturally said, OK. I hadn't used it until now, but I think it's one of my new favorite cartridges. There are lots of intricate patterns, but also some cool borders and other items. It seems to be my Go To cartridge. I used it to create the border and shadow on the first page and the flowers.

The patterned paper I used on the second page has some yellow on it and the pink and yellow looked so pretty, so I tried to add yellow onto the layout. I did some flowers and the shadow in yellow, but I couldn't do it. It just didn't look good. I know I get caught up in monochromatic and I've had my sister tell me to just add some colour, but I still fall back into what I feel comfortable. And that's OK. Sometimes, it's fun to experiment (I did that today - holy colour Batman; watch for that post in a day or two - you'll know it when you see it), but there is nothing wrong with doing what we do well. So, try new things, but don't feel bad if it doesn't work. We won't like everything we make. And that's fine. Once in awhile, though, it will work and we'll be left smiling.


Monday, February 14, 2011

Happy Valentine's Day

I've been on a roll lately and feeling creative. I had an idea for a card and thought I'd just go for it.

I have a Cricut which I quite like and use for scrapbooking all the time, but I don't think to use it when I make a card, but I thought I'd give it a try. I cut a heart out of Core'dinations paper and then embossed it with the Seeing Spots Cuttlebug Folder. I quite like that folder! Then I sanded the embossed areas and some of the edges to give it that cool distressed look that is so easy with the Core'dinations paper. I stamped a background image. It's from the "I See Paris" set by Tim Holtz (that is one of my favorite sets). Originally, I kind of wanted a background over the whole card, but it wasn't big enough, so I just did it on an angle so it wouldn't look awkward and I think it worked well. Then I tied a little ribbon on the heart and layered it all on the card. I stamped "Je t'aime" (Heidi Swapp) with black ink and called it a day. Then I made two more so I could give them to the kids.

I really love it when a plan comes together!

Sunday, February 13, 2011

Sweet Pea

I love this little stamp by Amuse; it's a little baby pea and there is a coordinating word stamp which says "Sweet Pea." I used these on my birth announcements for Nathalie and thought they were so cute. I decided my next layout would be the one with her birth announcement. I had an 8x10" photo which I wanted to use since it was the one we sent out in her birth announcements.

So, the first page was done. Wow. That was easy. I had a cool vellum overlay and I just put a picture of her on that and it looked pretty good. On the other side, I had the birth announcement, but that was it. I looked back at Eric & Kayla's albums, but the pages I had with their birth announcements didn't really work for this one, so I was on my own.

I didn't know what else to put on the second page other than the announcement. There wasn't a whole lot else to say, and I kept staring at the mostly blank page when I had an idea. I figured, I'd just print a graphic on it like the sweet pea on the announcement, so I searched for images. Unfortunately, most of the hits were of actual sweet pea flowers, but there was this one image of a sweet pea made from paper which I thought was so cute, so I decided to just make my own and I was quite excited at how it turned out. I used an oval for the pod (although I trimmed it a bit to make it more oval; I wanted a more pointed end, but I'm useless with scissors, so I just left it alone and figured it was good enough). Then I cut the little head from the DoodleCharm Cricut cartridge and cut green shadows. I inked the edges and put it altogether and was quite pleased with the result. I cut the words Sweet Pea and added them to the first page.


Saturday, February 12, 2011

Nathalie Flowers

I sat down and scrapbooked yesterday. I was on a roll and got a few pages done. And I liked them. All is good in the world. The stars and the moon are aligned and the pages are starting to come!

I have barely started Nathalie's album and I've been somewhat stuck. I never know how to start the kids albums. There is so much going on when they are first born and what order to I put it. There are a thousand possibilities and it overwhelms me. Yesterday, I just pulled out Eric & Kayla's first albums and flipped through the first layouts and started re-creating them for Nathalie. I had bought a family tree sheet and wrote the names on that. Check, that was done. Then I needed something to go beside it, so I thought I'd do her name page.

I'm all into quick scrapbooking, but it's fun to play once in awhile and do something more detailed. I was all about playing yesterday! I started just ripping paper and placing it and making it work. Originally, I wanted the page to be brown and green to match the family tree page, but Nathalie was wearing a pink outfit in the photo, so it morphed into pink and brown. And it worked out. I quite like those colours together and frankly, after doing so many layouts in Eric's album, I was sick of those colours. I'm excited to do pinks and purples again.

I've been playing more with my Cricut lately and so I just putzed around and started making flowers which I added. I tried various combinations, but in the end, stayed with the dark brown and pink. And when I finished, I really liked how it turned out.

Friday, February 11, 2011

New Paper makes me so Happy

People look at my craft room and always tell me I have so much stuff.

They are totally right, although I always say that compared to many of my friends, I don't have much at all. But I like to keep it all somewhat neatly contained in my room, so I'm running out of space. Which just means I need to buy more organizing things, right?

I had an hour to kill the other day and needed to pick up my scrapbook scans from my favorite scrapbook store, Scrapbook, Memories & More and so I thought I'd shop. I had just put up my Christmas portraits (yes, I've had them for 2 months and hadn't put them up yet) and the school pictures for the kids. That meant that I needed to scrapbook the photos I took out. I keep a separate album (which is actually caught up!) for all the "professional" portraits that I have of the kids. I started this just over a year ago and it's very nice to have all of those in one spot. I have 4 photos for each Christmas session now, though, so I figured I'd just buy new paper so that I could have stuff that coordinated and I didn't have to dig through my paper and try to find 4 sheets of the same paper.

I found some pretty brown and cream striped paper and some coordinating brown cardstock. Then I hit the motherload and found some red glitter paper which I figured would match the red dresses Kayla & Nathalie wore. I was even more excited when the awesome lady at the store told me that I could cut it with my Cricut. I was sold! I bought a bunch of other paper with specific layouts in mind which was fun and I was excited and motivated to get going again.

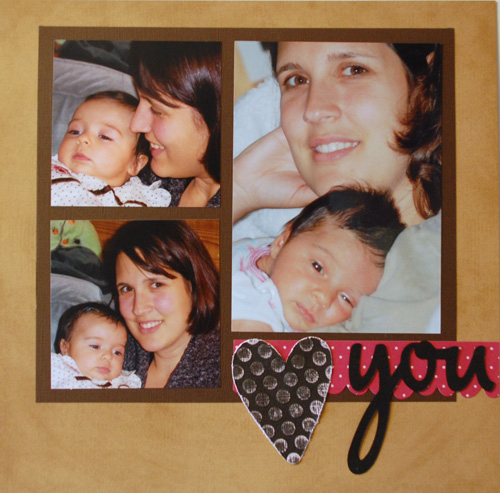
So, that night, I sat down and whipped off the 4 pages pretty quickly. They are very plain, but I still like them. I basically just matted the photo and cut out the name from the glitter paper and stuck it all down. It's very simple, but I still really like them. And the best part: I did all 4 pages in less than an hour (really quite a bit less I'd say).


I'm always so amazed at how getting new paper, or a new tool or something can make me so excited and get me back into it. Of course, it doesn't always work, but it's worth a try!

I have more posts coming (I know I've been absent). I have been back in the groove and have more to show (yeah!!). I'm going to try to get a couple posts ahead so that if I don't get here every day, I can still keep up with what I've been making.

Tuesday, February 8, 2011

Asian Shimmer

I really struggled with this card and while I don't love it, I like it well enough, so I thought I'd share. I created the background with Gold Lumiere and Fired Brick Distress Ink using the technique I described in my last post. You can really see the gold which I love. It had a very Asian look to me, so I stamped the bamboo on the background. Then I stopped because nothing I did after that looked good. Nothing. So, I walked away for a couple of days and came back to it. I then had the thought to use my Cricut (Pagoda cartridge) and just cut out an Asian symbol and mount that instead of trying to find a stamp that I could make work. I added a bit of embroidery floss and called it a day.

Wednesday, October 13, 2010

Smile

I wanted to do another quick layout today, but all of a sudden it was 8:00 and I hadn't gotten into my craft room. But I did it.

One of the reasons I wanted to start blogging was to showcase different ways to use product. I love reading about what others do and so I wanted to share too. And I didn't want to inundate my customers with a ton of emails, so those who are interested can read at their leisure. I'm going to be ramping it up a bit and starting some contests and giving away some prizes. Stay tuned!

I have done most of my major layouts for Eric's 4th year. I have a few single layouts left, then his birthday layout and a couple miscellaneous ones with extra photos I haven't yet used. I found this picture and knew this is the page I wanted to do. Although the photo is just a year and a half old, I can't believe that's him. He's changed so much! We have a big rock in front of our house and the kids love to sit on it and pose for photos. This one was taken Easter 2009. I knew I wanted a simple layout and so I basically just matted the photo and added a title. The title is made from Grungepaper which I love! You can cut it with a die cut or I cut it with my Cricut. Then you can make whatever shape or letter, in whatever size you want. Then you can colour, spritz, ink, stamp on it. It is just about impossible to wreck it. Even if you soak it with liquid, it doesn't peel or get all fuzzy.

Grungepaper has a right and wrong side. The right side is soft, kind of like suede. The back side isn't soft and has a criss-cross type pattern. I cut my Grungepaper with my Cricut. I got a new mat out because my old one wasn't very sticky and you want lots of stick. I typed in my title and then cut it on multicut with high pressure. It was fine. I just used my regular (not deep) blade. Then I inked my letters with Blue Iris chalk ink and I put my layout together.

For those interested in Grungepaper, it now comes in 6x12 pack (6 sheets to a package). I have several packs in stock. You can email me or post if you'd like one (they're $6).

The colours don't show exceptionally well (they're navy blue and tan) as it's late and there isn't a lot of light. I wanted to post tonight so I couldn't wait to take the picture tomorrow. Sorry!

I'm going to have a draw from comments and send out a little prize to a random poster, so please let me know what you think.